
Understanding Vapor Barrier Installation
What is a Vapor Barrier?
A vapor barrier is a material that resists condensation and moisture transmission through walls, floors, and ceilings. Typically made of polyethylene plastic sheeting, this protective layer is crucial in various applications, particularly in areas prone to moisture, such as crawl spaces and basements. The primary function of a vapor barrier is to control moisture levels, preventing mold and mildew while safeguarding structural integrity over time. During Vapor Barrier Installation, careful consideration should be given to the material choice, thickness, and installation technique to ensure maximum effectiveness.
Importance of Vapor Barriers in Crawl Spaces
Crawl spaces often act as a bridge between the ground and a home’s living area. Without proper protection from moisture, this transition can lead to several problems. Vapor barriers are essential in maintaining a dry environment, which is pivotal for several reasons:
- Mold Prevention: High moisture levels in crawl spaces foster mold growth, which can spread to other parts of the house, posing health risks.
- Structural Integrity: Excess moisture can lead to wood rot and structural damage, weakening the foundation over time.
- Energy Efficiency: A well-installed vapor barrier can contribute to energy savings by regulating temperature and humidity levels.
Key Materials Used in Vapor Barrier Installation
The choice of materials for vapor barrier installation is critical to its performance. Commonly used materials include:
- Polyethylene Plastic Sheeting: The most widely used material, available in various thicknesses (usually 6 to 20 mils), providing effective moisture resistance.
- Foam Board Insulation: Offers both insulation and moisture resistance, often used in conjunction with plastic sheeting.
- Sealants: Such as caulk or tape, which are used to seal seams and ensure that moisture does not penetrate through gaps.
Benefits of Proper Vapor Barrier Installation
Preventing Moisture Damage
The most significant advantage of a properly installed vapor barrier is its ability to prevent moisture damage. By blocking groundwater and humid air from entering crawl spaces, it effectively reduces the risk of mold growth, wood rot, and pest infestations that thrive in damp environments.
Improving Indoor Air Quality
Moisture in crawl spaces can lead to poor indoor air quality. As humidity levels rise, spores, bacteria, and other allergens can circulate throughout the home. A well-installed vapor barrier minimizes moisture, thus improving the overall indoor air quality and ensuring a healthier living environment.
Enhancing Energy Efficiency
Moisture control plays a crucial role in energy efficiency. By preventing drafts and regulating temperature fluctuations, a vapor barrier helps homeowners save on heating and cooling costs, promoting a more sustainable living environment. This not only benefits the environment but also reduces energy bills.
Steps for Effective Vapor Barrier Installation
Preparing the Crawl Space
Prior to installation, it’s essential to prepare the crawl space. This involves:
- Removing debris, rocks, and any existing barriers.
- Ensuring proper drainage systems are in place to divert water away from the foundation.
- Cleaning surfaces to ensure solid adhesion of the vapor barrier material.
Measuring and Cutting the Vapor Barrier
Accurate measurements are crucial for effective vapor barrier installation. Follow these steps:
- Measure the dimensions of the crawl space, including length, width, and any pillars or obstructions.
- Based on measurements, cut the polyethylene plastic sheeting accordingly, allowing extra material for overlapping seams.
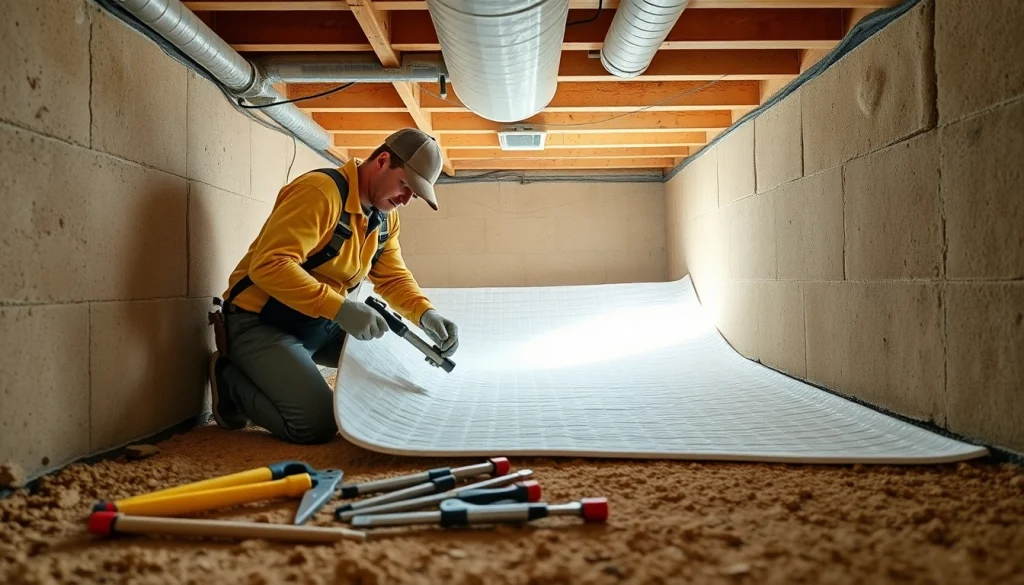
Securing the Vapor Barrier
Once cut, the vapor barrier must be secured to ensure its effectiveness:
- Laying the plastic sheeting on the ground and up the walls of the crawl space, overlapping seams by at least 12 inches.
- Using sealants to secure edges and seams, ensuring no gaps exist where moisture can penetrate.
- Weighting down the edges with stones or securing them to walls with fasteners for additional stability.
Common Challenges in Vapor Barrier Installation
Dealing with Uneven Surfaces
Uneven dirt or concrete surfaces can complicate the installation process. To tackle this issue:
- Grade the surface, ensuring that it is smooth and slopes away from the foundation to facilitate water drainage.
- Utilize foam board insulation or extra material to cover pits and uneven areas for a proper fit.
Addressing Humidity Issues
If humidity levels are excessively high, it may be necessary to install a dehumidifier before laying down the vapor barrier. This can help create a conducive environment for effective barrier installation and prevent future moisture issues.
Finding the Right Sealants
Selecting appropriate sealants is crucial for a long-lasting vapor barrier. Ensure you choose products that are:
1. Compatible with polyethylene.
2. Durable and resistant to mold and mildew.
3. Easy to apply and provide a strong seal.
Maintenance and Inspection of Vapor Barriers
Regular Checks and Repairs
Conducting regular inspections of your vapor barrier helps in maintaining its effectiveness. Look for tears, punctures, or areas where it has come loose. If any issues are detected, they should be repaired promptly to prevent moisture infiltration.
Long-Term Performance Monitoring
Monitoring the performance of the vapor barrier is essential in evaluating its effectiveness. Homeowners should check for:
- Signs of moisture or mold accumulation.
- Changes in indoor air quality.
- Temperature fluctuations in the home that may suggest deterioration.
Signs of Barrier Failure
Recognizing the signs of vapor barrier failure is crucial for timely intervention. Watch for:
- Mold or mildew growth on walls or floors.
- Musty odors in the home.
- Increased humidity levels in the crawl space.
FAQs About Vapor Barrier Installation
1. How often should I inspect my vapor barrier?
It’s advisable to inspect your vapor barrier at least once a year or after significant rainfall to check for damage or moisture accumulation.
2. Can I install a vapor barrier myself?
Yes, with the right tools and materials, a vapor barrier can be installed as a DIY project. However, professional installation is recommended for complex situations.
3. What thickness should my vapor barrier have?
A 6-mil thickness is common for residential applications, but for higher moisture areas, a thickness of 10 mils or more is recommended.
4. What can happen if I don’t install a vapor barrier?
Failure to install a vapor barrier can lead to elevated moisture levels, mold growth, pest infestations, and potential structural damage over time.
5. Are vapor barriers necessary in all climates?
While not all climates require vapor barriers, they are highly beneficial in humid and wet regions to prevent moisture issues. It’s best to assess your local climate conditions.